Application Publishing
Overview
TSplus supports 4 different kinds of Application Publishing:
- Microsoft Remote Desktop.
The user will see the full Windows Remote Desktop in the session. - TSplus Taskbar.
Any application, folder, shortcuts, documents… copied on the user's Desktop folder will be published with the TSplus Remote Taskbar.
In this case, the user does not have any access to applications other than those decided by the administrator.
Application Control has a much finer grain. - The Floating and Application Panels.
All the applications can be published on a mini drop-down list or on a folder which you can customize. - Assigning one, two, three, or more specific applications to a user/group.
In this case the user will only see their assigned applications when opening a session.
There is a priority rule to remember: The Microsoft Remote Desktop has the highest priority, then the TSplus Taskbar, then specific applications.
If a user has a specific application assigned and TSplus taskbar or Microsoft Remote Desktop, they will not see the specific application because they have a lower priority.
Managing Applications using the Admin Tool
You will add, edit or remove applications using the AdminTool, by clicking on the "Applications" tab -> "Publish":
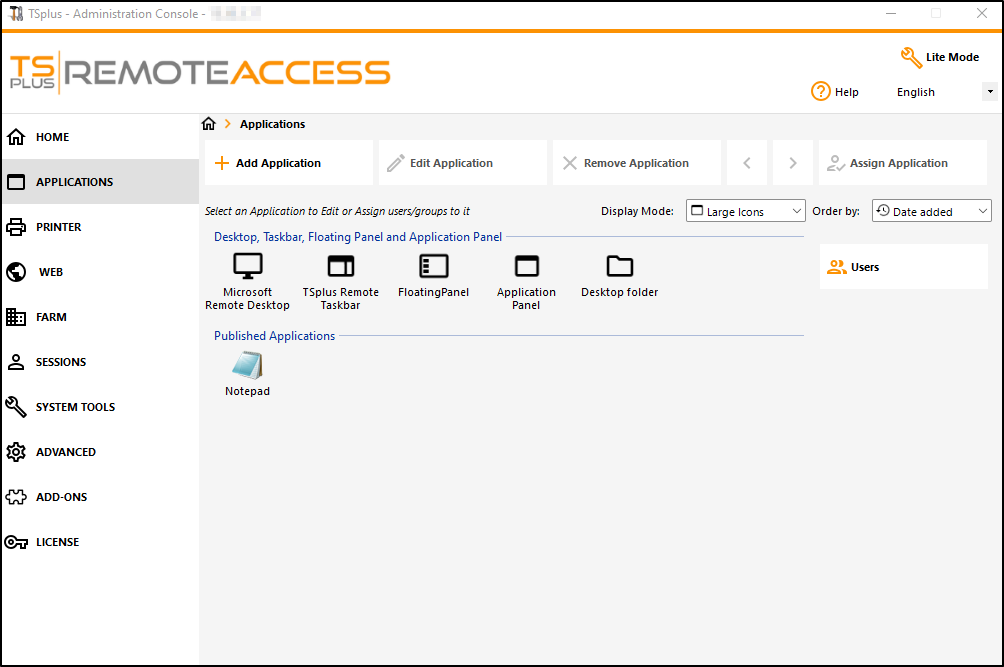
Click on the "Add Application" tile in order to publish an app:

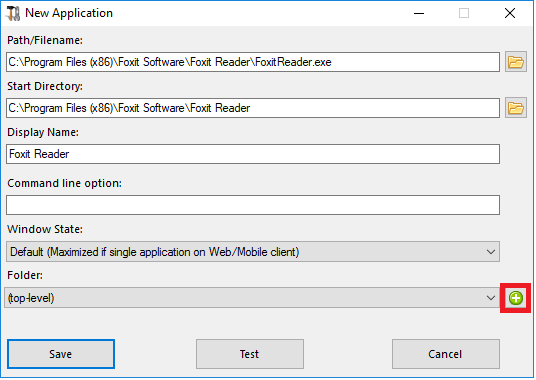
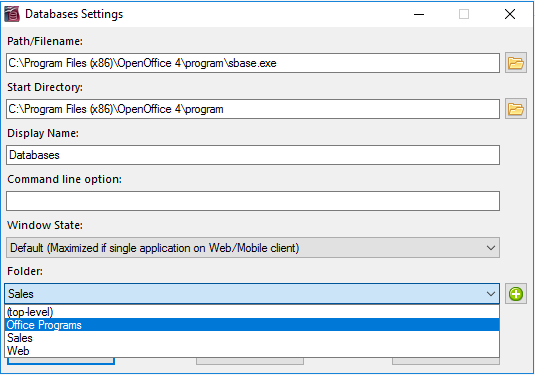
- Foxit is published as an example. To publish an application, click on the "Add application" button, then locate the path of the executable of your application by clicking on browse, then set a name for this application in the dedicated field.
- You must click on the "Save" button to store any modification.
- After declaring a new application, we recommend to use the "Test (start selected)" button to check that the application is functional before assigning it to your users.
- You can specify for each application if it will be launched maximized, minimized, assigned to all the users or if it will be hidden after launch.
- You can add a command line option if you need to add some extra parameters which are usually set in the shortcut properties of the application.
- Since TSplus 12.40 version, you can now create a new folder in which you can publish your applications. (See below for more information) By default, they are published on the top-level folder.
Note: You can change the orders of applications by clicking on the left or right arrows, next to the "Assign Application" button:

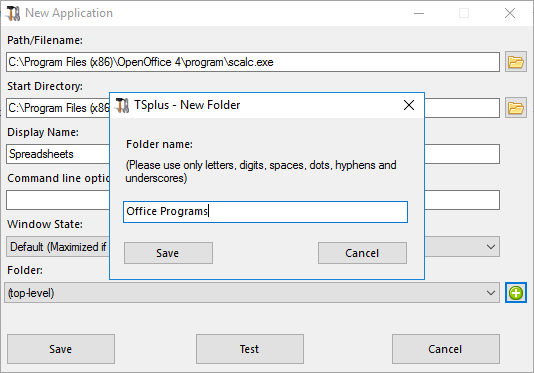
Managing Applications Folder using the Admin Tool
You can add, edit or remove Applications Folder on the same dashboard.
First by publishing an application, then by clicking on the "+" button at the bottom-right under the "Folder" selection:
Then enter the name of your new folder:
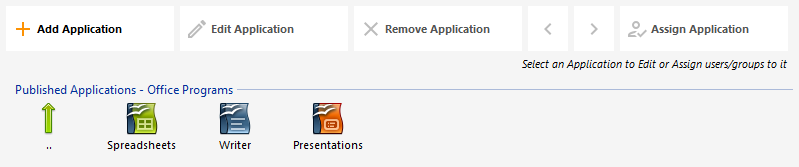
The Folder then appears under your published Applications:
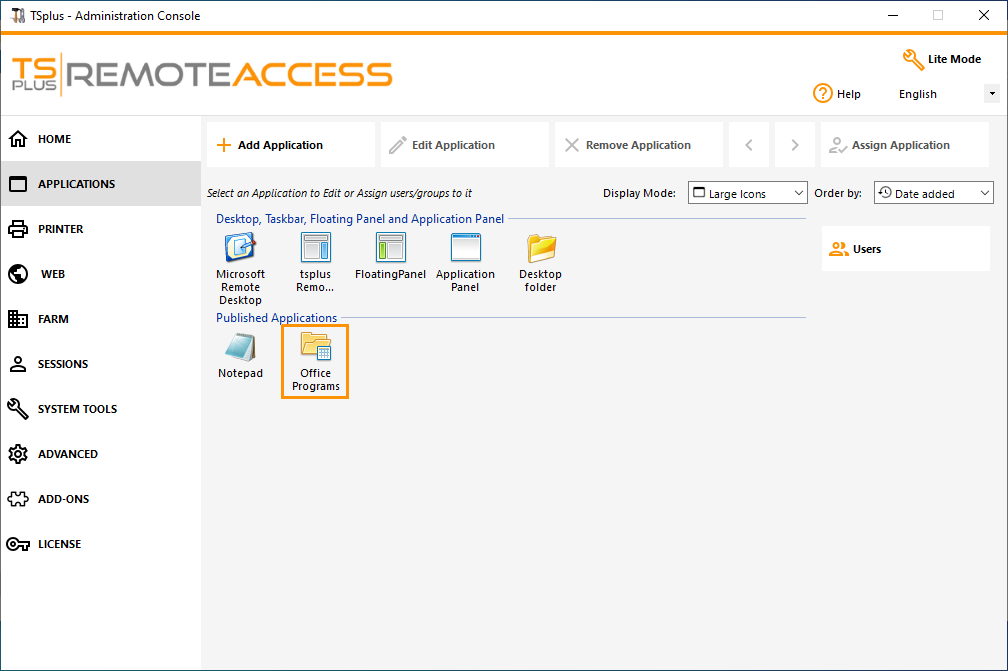
Double-click on it to see, edit or remove each published application:
Each time you publish an application, you can select or create the folder in which it will be published:
You can then assign the Folder to users or groups as an application, and publish it, like any application with the TSplus Remote Taskbar, the The Floating Panel and Application Panel or the Web Portal.
See this documentation for more information on applications assignments.
Important remarks
- After installation, the default setting is: Any RDP user will see the complete Microsoft Remote Desktop.
- The TSplus Taskbar publishes all shortcuts copied in the user's Desktop folder. When selecting TSplus Remote Taskbar, you can request to automatically copy any of the shortcuts available in the All Users Desktop folder and/or, to automatically create shortcuts from applications assigned to the users with Application Control.