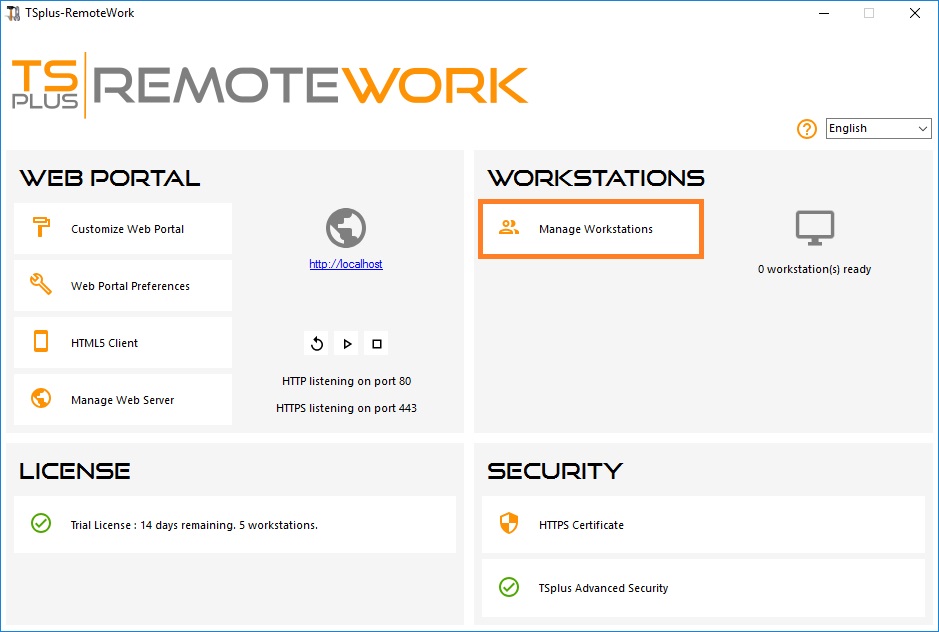
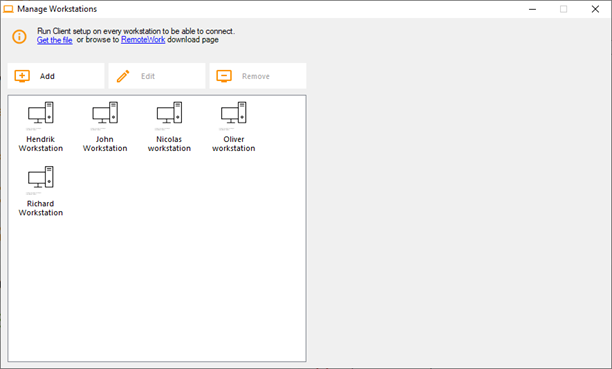
Manage Workstations
1) Click on Manage Workstations to begin:
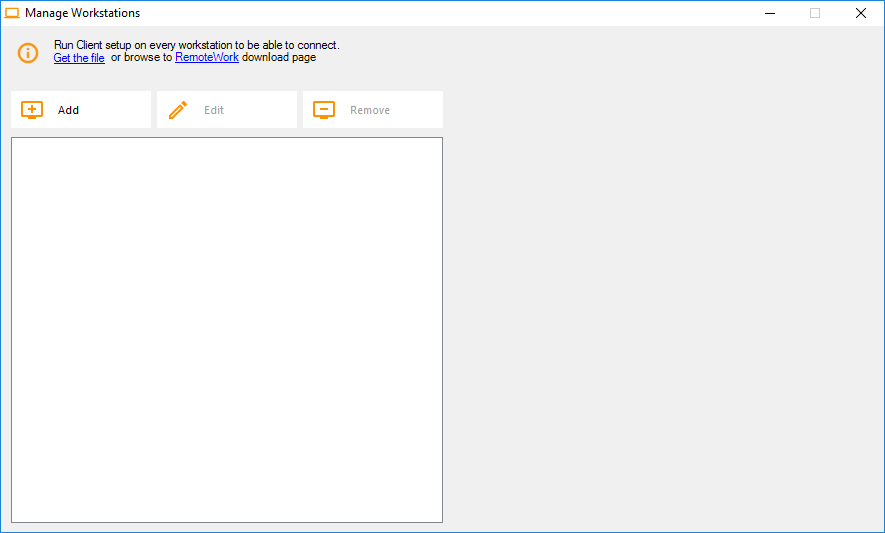
2) Click on Add and enter a friendly Workstation name and it’s IP address.
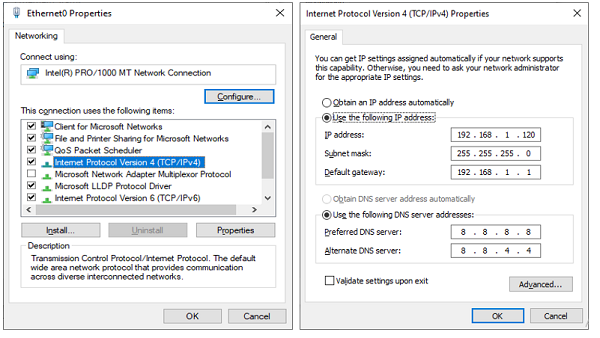
Of course, all of your users’ workstations and the “Connection Broker” must have a fixed IP address:
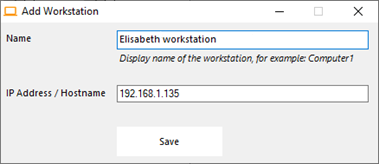
In the case of Elisabeth, her PC’s IP address is 192.168.1.135:
Repeat this process for the rest of your client PCs:
3) Assign PCs to users:
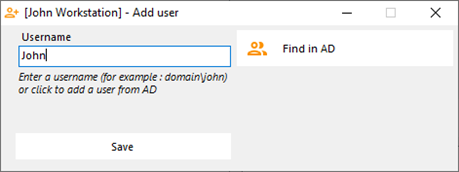
Let’s take the example of John. Select ‘John Workstation’ and click on ‘Add’ in Users section on the right:

In this example, the Windows login on this PC is “John”. You can use the Active Directory login if PCs are members of a domain:
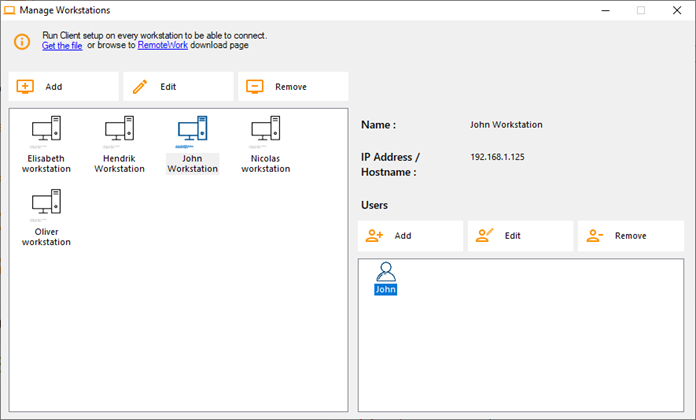
John’s workstation is now all set and ready to go:
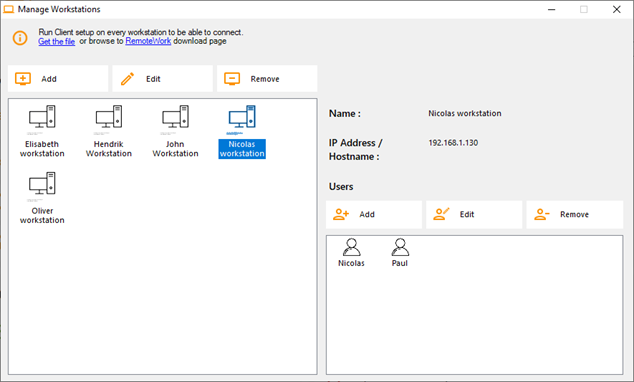
4) Multiple users:
Nicolas and Paul share a PC at work. Paul uses it during the morning shift and Nicolas, during the evening shift. So, for this example, we will assign two users to Nicolas’ workstation.
5) Workstation setup:
On each of the 5 users’ workstation assigned in the Connection Broker, download and run the client setup program. It is a small program: You can easily ask each of your users to do it themselves.
The download link is http://192.168.1.120/download
Where 192.168.1.120 is the IP address of your TSplus Remote Work Connection Broker:

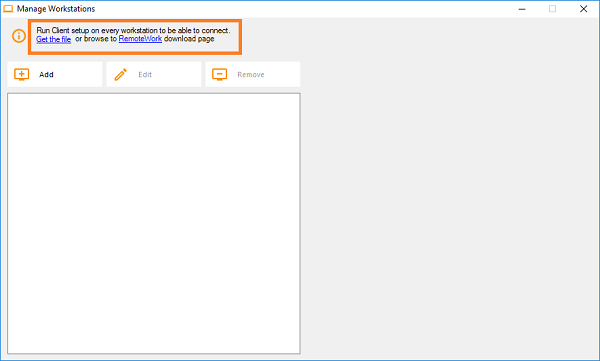
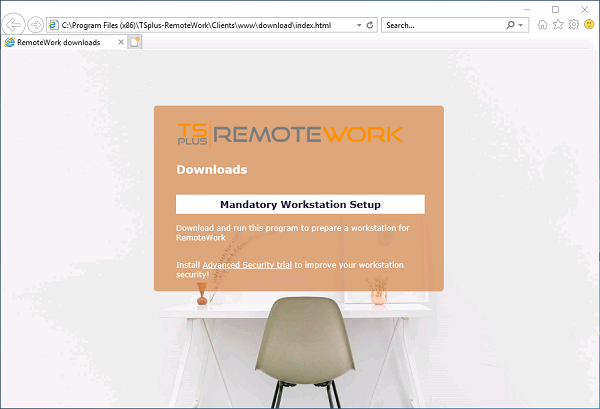
You can also download it by clicking on one of the links on the Managing Workstations tile:
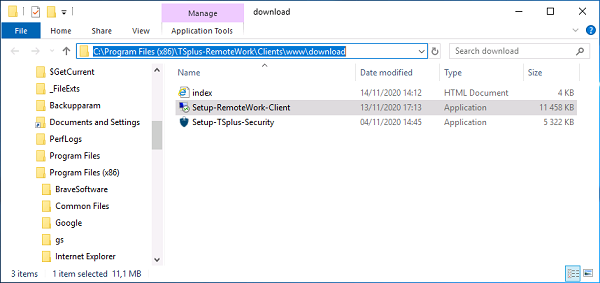
Which correspond to these paths:
C:\Program Files (x86)\TSplus-RemoteWork\Clients\www\download\index.html :
And
C:\Program Files (x86)\TSplus-RemoteWork\Clients\www\download\
Once these steps are completed, you are all set and can begin using TSplus Remote Work.