Universal Printer
The TSplus Universal Printer allows you to preview or print documents from any PC or mobile device supported by TSplus Remote Access. Universal Printer is relevant from an HTML5 session and when connected using a generated client. Universal Printer is not relevant when using the standard RDP client (mstsc.exe) because printers can be shared between server and client. See the video tutorial to print with the Universal Printer.
Starting Remote Access version 17, Universal Printer leverages novaPDF (https://www.novapdf.com/) to produce 100% industry-standard PDF (Portable Document Format) files from the remote document. The generated PDF document is then sent to the desired local printer. The Universal Printer (novaPDF) replaces Universal Printer (CustPDF) and Universal Printer (GhostScript) which are discontinued and no longer available to install on your Remote Access server.
Two printers are available for remote printing: Universal Printer and Virtual Printer. Although Virtual Printer offers better printing performance, it is not compatible with the HTML5 client and requires to install a client application. Therefore, the Universal Printer is set as the default printer following Remote Access setup. See TSplus Virtual Printer.
Requirements
NovaPDF11Service service should be in the exlcusion list of any active firewall or antivirus.
Configure the Universal Printer
To configure your Universal Printer, open the AdminTool and click on the Printers menu.
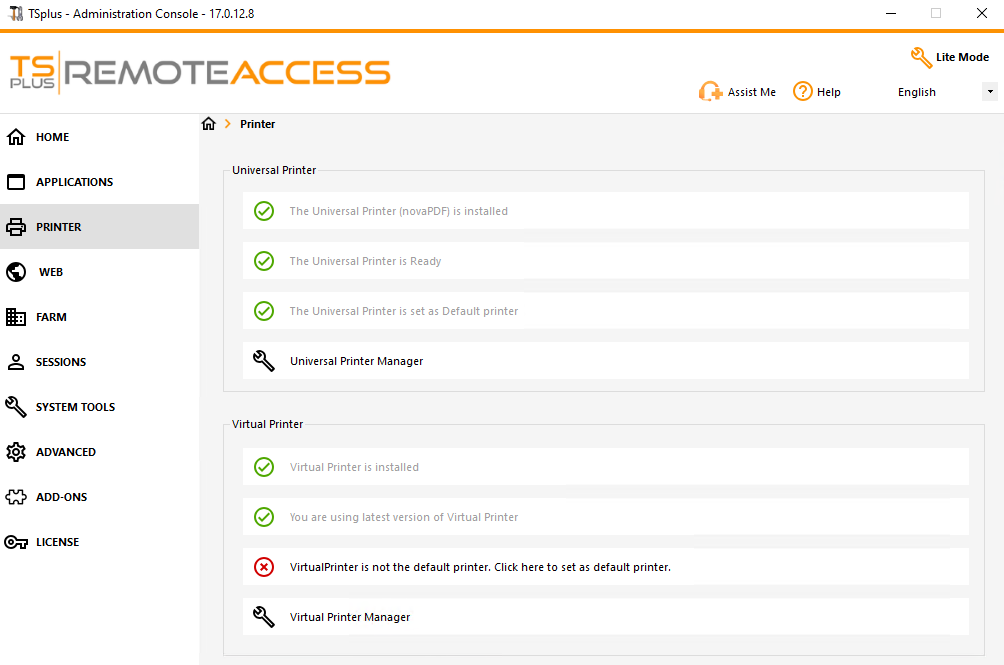
The Universal Printer section displays fours tiles which enables administrators to:
Check the Universal Printer setup status. If the Universal Printer is not installed, then clicking on the tile will install the Universal Printer.
Check the Universal Printer printing status. If the Universal Printer is not ready to receive print jobs, the tile may display additionnal relevant information about the error.
Check if the Universal Printer is set as the default printer. If the Universal Printer is not set as the default printer, then clicking on the tile will set it as the default printer. Please note that this behavior may be overriden by your users should they be allowed to do so.
The tile named Universal Printer Manager leads to an more detailled screen which provides additonnal actions and properties, such as removing the Universal Printer.
Universal Printer Manager
The Universal Printer Manager allows administrator to check the Universal Printer status, remove the Universal Printer, access to the printing queue and printer properties.
In particular, the button located at the bottom of the page allow administrators to:
Remove the Universal Printer: Uninstall the Universal Printer. It can be reinstalled later from this screen.
View Printer: Opens a window where you can see the status of your printing documents, pause, resume or cancel the print job. You can also set your printing preferences and properties.
Universal Printer Properties: Opens this window, where you can see all the printing properties. After the General Tab, there are tabs for sharing, ports, advanced, color management, security and device settings. At the bottom of the popup window, the printer properties allows administrators to set the page size for printing from A4 to any kind of printing format. You can also choose between two printing orientations: Portrait or Landscape.

Note: The Universal Printer leverages novaPDF, which enables administrators to create profiles to define fonts, graphics, watermark, overlays and more through the Manage profiles button located below the Page size and Orientation sections on the printer properties popup window. Should a profile be selected by default, then the Show Select Profiles dialog before printing may be checked to allow user to select a profile before printing. Please refer to the novaPDF documentation for more details about profiles: Profile Manager.
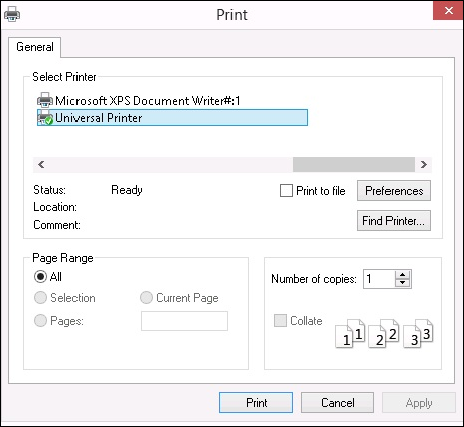
Printing with the Universal Printer
While printing using this printer, the document in the print queue is automatically converted into a PDF file by the Universal Printer (novaPDF) printer.
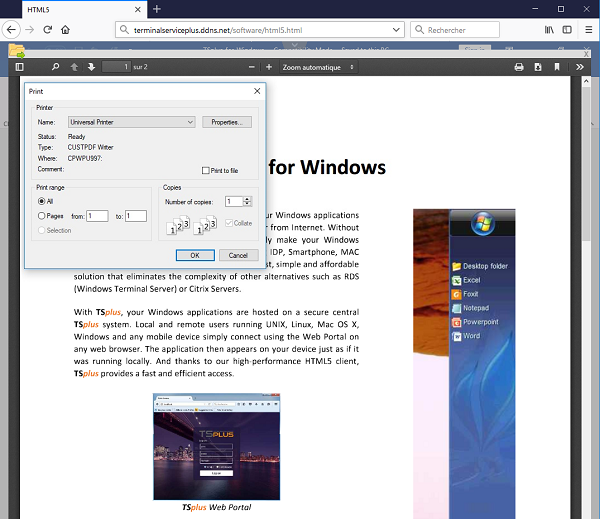
The generated PDF file is then pushed to the local PDF reader of the user's workstation.
Each print job is opened as soon as it is ready on the user's local disk. The printing process starts once the PDF file has been transferred on the client' side, which guarantees the print job to start without delay.
Configuring Printing options with the Client Generator
You can choose from 3 printing options on the Local Resources tab of the Portable Client generator:
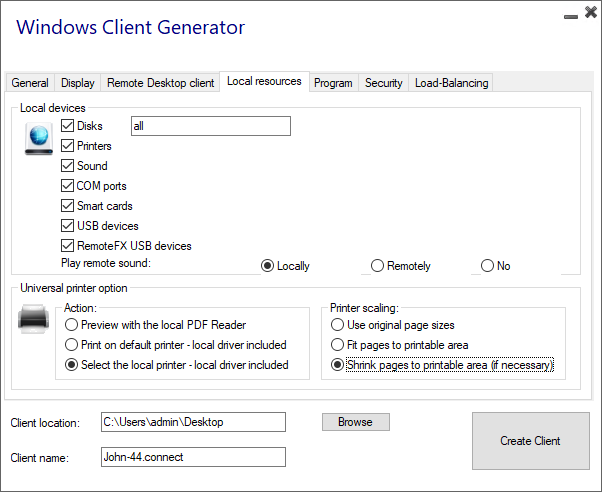
Local PDF Reader preview: the document is pushed on the client's workstation and the local default PDF reader opens the received PDF file. The user can then print it, or save a copy on his local disk drive (this behaviour is expected when printing from an HTML5 session).
Print on the user's default printer: the document is automatically printed by the user's default printer (this option is only available when using th TSplus connection client). This option is preferred for users who have a lot of print jobs to print during the day and use the same printer for this purpose.
Select a local printer: the user can select one of his local printer (this option is only available when using th TSplus connection client).
For reading PDF files, these days many people get by without having to use an external application at all. Both Firefox and Chromium, the open source version of Google's Chrome browser, come bundled with in-browser PDF readers, so an external plugin is no longer necessary for most users.
Configure novaPDF printer
From Printer Preferences > Tools > Password, you can:
- Edit the default password
- Change the Profile Manager interface’s language
- Monitor the progress of print jobs in real-time
- Check the printer history
Opening print job in a new tab
By default, print jobs from an HTML5 session are displayed inside a pop-up as before version 17.10.
It is possible to modify this behavior and open print jobs in a new browser’s tab using the following setting: AdminTool > Advanced > Session > Open Print Jobs In New Tab
Profiles
Profiles enables to customize layouts, watermarks, compression level and much more. The Profile Manager allows you to manage profiles. Profiles consist of configurations utilized when printing using the Universal Printer. For instance, you can establish various printing profiles tailored to specific output requirements, such as distributing PDFs, high-quality printing, review purposes, or marking documents as confidential.
To open Profile Manager, open Devices and Printers, right click on Universal Printer and select Printing Preferences. Then, click on the Manage Profiles button. The default password is: pass@word1
Understanding the default profiles
- Default Profile: the default profile is intended to work for printing a single or multiple documents at a time. Suitable for most scenarios.
- Print Opened Documents Profile: Use this profile to automatically print a document when opened usign a PDF viewer. This profile is useful to gain a click when printing from an HTML5 session.
When opening an HTML5 session, the Print Opened Documents Profile is selected automatically for the current user. However, auto print in HTML5 session will be disabled if another session is currently opened for the same user in RDP mode. In this case, the Default Profile is applied by default.
Note: The Print Opened Documents Profile cannot be selected automatically for UWP applications such as Notepad in Windows 11 because these applications are designed to run in complete isolation with the system. However, it remains possible for the user to manually select the profile to use and to choose it by default for the next print jobs. There is no workaround at the moment. However, the redesign of the novaPDF printer scheduled for the next novaPDF major release due Q4 2024 will lift this limitation.
What profile can user choose?
By default, users can choose which profile to use among the two default profiles. Users are allowed to select one profile as active and do not show the Select Profile dialog box for the next print jobs. Administrators can define one or multiple profiles available for all users. This decision supersede any users’ choices. See https://www.novapdf.com/printer-manager-profiles-help.html.
Important: It is recommended to copy the existing profiles to create more personilized profiles, as exisiting profiles embed several features required for most installation, such as embeded fonts in the generated PDF document.
Troubleshooting
Please find below troubleshooting tips to resolve Universal Printer (novaPDF) issues.
Staying up-to-date
- Updating the Connection Client may fix some issues occurring on the client side.
- Review the changelog to see if a newer version fixes your issue at https://dl-files.com/TSplus-changelog.html
- Remember that the development team can only support the latest code base.
Understanding which part of the printing process failed
- Has the print job been created in the print queue ? What is its status ?
Collecting logs for printing errors
- Session opening logs, especially useful for issues like failed retrieval of client print directory, located at C:\wsession\trace.
- AdminTool application logs located at C:\Program Files (x86)\TSplus\UserDesktop\files.
- Universal Printer logs, sending the print job to the client side, located at C:\wsession\UniversalPrinter\logs.
- Session events logs for the printing user, handling reconnections, located at %appdata%\UniversalPrinter\logs.
Collecting logs for printer installation issues
- Setup Log 2024-02-XX #XX.txt available in the %temp% directory.
- universalprintermanagement_XX022024.txt located at C:\Program Files (x86)\TSplus\UserDesktop\files.
- All .txt files located in C:\Program Files (x86)\TSplus\UserDesktop\files\UniversalPrinter.
Collecting logs for client-side printing errors, when using the Connection Client
- version.dat file. Please always advise to update Connection Client to latest version.
- Connection Client and Universal Printer Client logs. These logs can be enabled by creating the following key value in the registry:
HKEYLOCALMACHINE\Software\Digital River\ConnectionClient\Debug" = "true". The resulting logs are located here: C:\Users\
\RDP6\logs .